Configure push-to-talk for a user
The push-to-talk feature allows users to treat their phones as either a one-way or two-way intercom. When enabled, the administrator can create an allowed or blocked user list. For example, you can create a list of customer service representatives who can (allowed list) chat with Jim in the warehouse using push-to-talk on their phones. This way, the reps can quickly chat with Jim about things like inventory and delivery schedules.
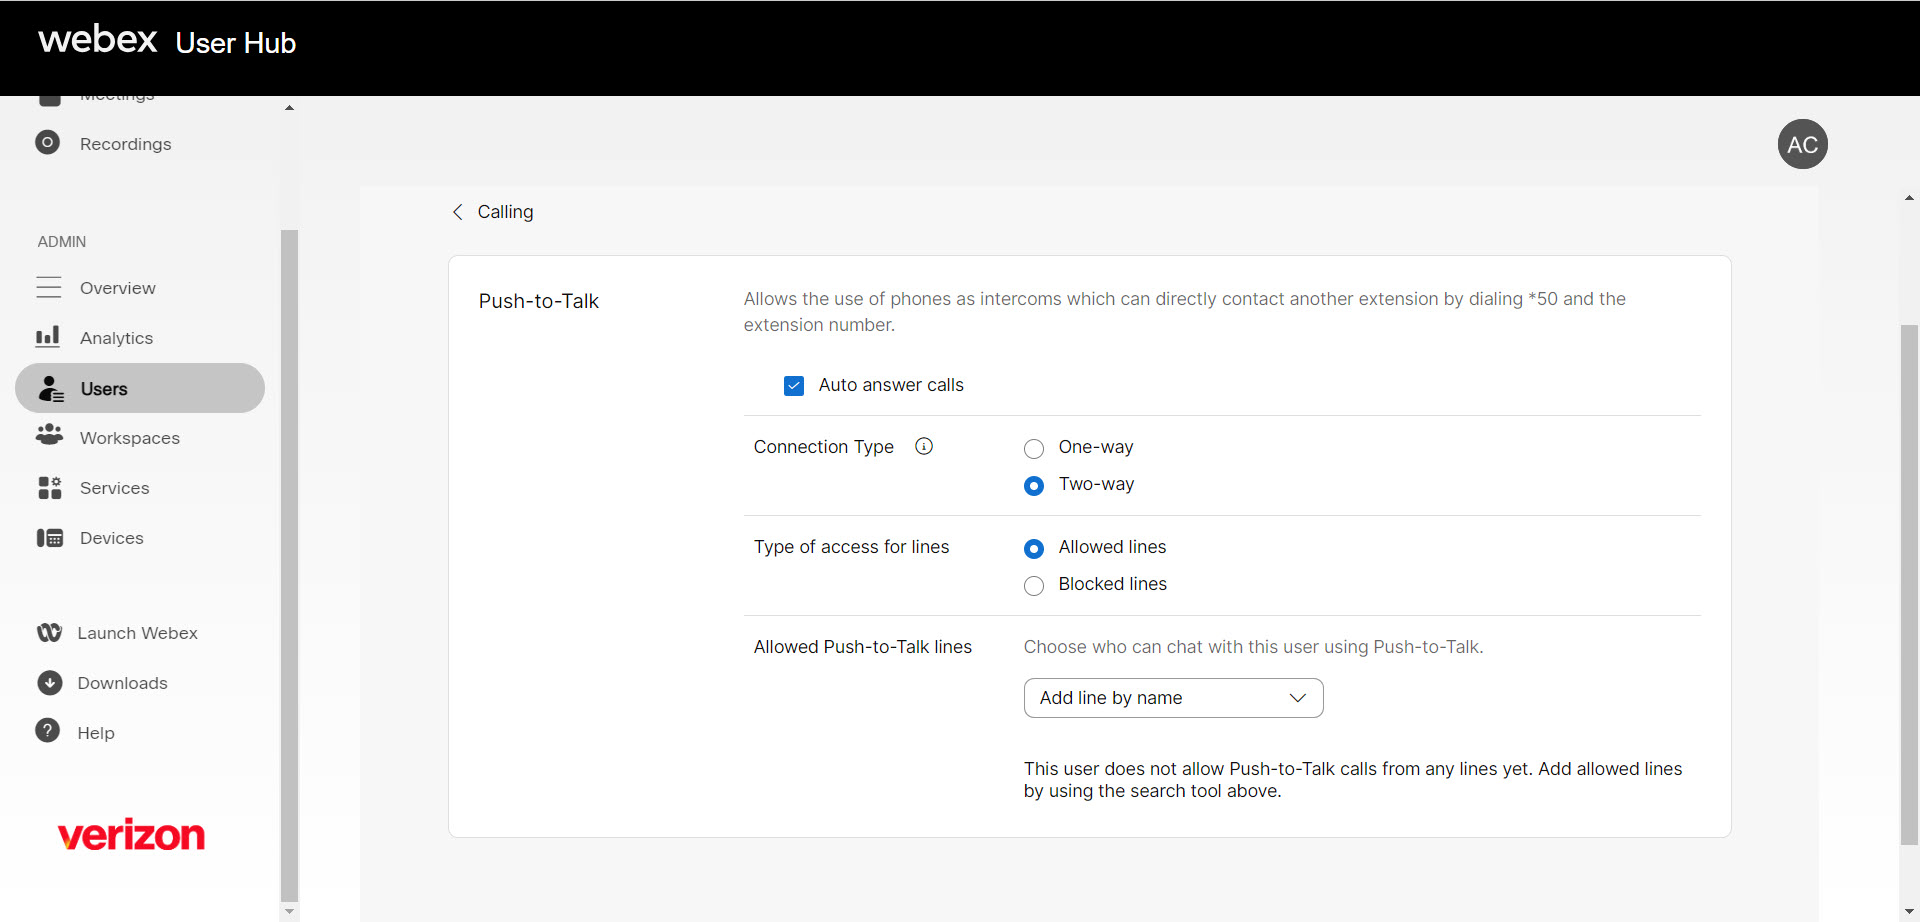
Users dial *50 and the extension to place push-to-talk calls.
To configure a user’s push-to-talk settings, follow these steps:
- Log in to User Hub.
- Under Admin, in the left menu, select Users.
- Select the user you’d like to modify.
- Select Calling.
- Scroll down to Between-user permissions and select Push-to-Talk.
- Check the box next to Auto answer calls, if applicable.
- Next, choose a Connection Type:
- One-way - The users you add to the allowed users list can chat with this person but only in one direction. With this option, the person you enable push-to-talk for cannot respond to the people in the allowed user’s list.
- Two-way - The users you add to the allowed users list can have a two-way conversation. With this option, the person you enable push-to-talk can respond to the people in the allowed user’s list.
- Choose the type of access for your user list – Allowed lines or Blocked lines.
- Use the drop-down menu to find and select the users to add to the allowed or blocked user list.
- Select Save to save your changes.